The mailing label features will allow you to create mailing labels or download data into Microsoft Excel to support custom marketing materials and letters.
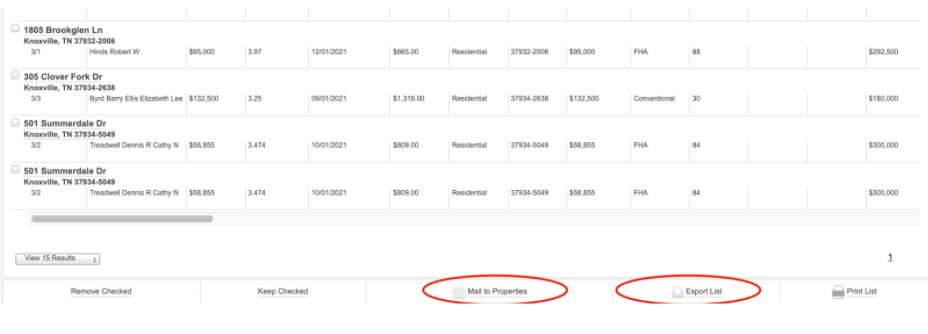
Start by clicking the Prospecting tab. After you select the necessary parameters and click to view the results page, you will have the option to create mailing labels or export the list. A variety of options are available at the bottom of the page to help you share and use the addresses.
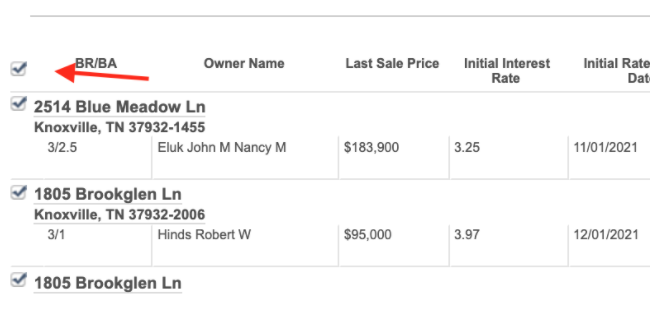
Be sure to click on the select all box at the top of the property address listings, or individually select which properties you wish to create labels for from the list. You can do so by clicking in the box next to the addresses. Then, click Mail to Properties or Export List.
Reviewing Address:
Selecting Addresses for Mailing Labels:
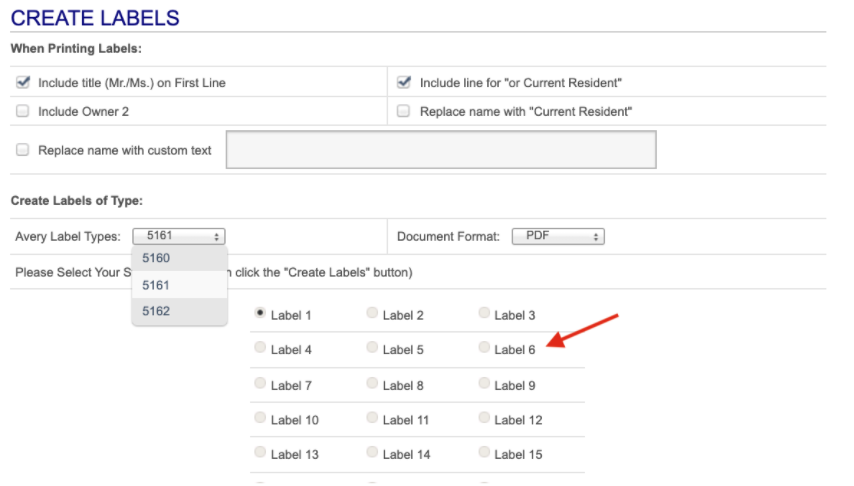
To create printing labels, select Mail to Properties. You will then navigate to the Export/Label Options section where you can select the options you wish to appear on your labels. You may also edit various fields here.

You can also choose the Avery label type you will print on under the Avery Label Types dropdown box. You can include a line for current resident or replace the addressee’s name with custom text. If you are using a partially used sheet of labels, you can select your starting label. For example, if the first five labels on a sheet have been used, select the button to start printing on Label 6.